Razorpay Integration Setup
Razorpay is the leading payment gateway for businesses in India. It allows your subscription bot to accept payments via UPI, Credit/Debit Cards, Netbanking, and popular wallets.
Why Razorpay?
- India's #1 Choice - Best-in-class support for UPI and Indian payment methods
- Wide Coverage - Supports 100+ payment modes including JioMoney, Mobikwik, Airtel Money, and more
- International Support - Accept payments from cards issued outside India (requires approval)
- High Success Rates - Dynamic routing tracks successful payment paths
Prerequisites
Before connecting Razorpay to your subscription bot, you'll need:
- A Razorpay account (Sign up here)
- A Key ID and Key Secret
Generating API Keys
- Log in to your Razorpay Dashboard.
- Navigate to Account & Settings (at the bottom left) -> API Keys.
- Click "Generate Key" (in Test Mode for testing, or Switch to Live Mode first for production keys).
- You will see a
Key IDandKey Secret. - Important: Copy the
Key Secretimmediately. You won't be able to see it again.
Do not share your Key Secret with anyone. If you lose it, you will need to regenerate your API keys, which may disrupt existing integrations.
UPI QR Code Activation Required:
Razorpay QR codes (upi_qr) are an on-demand feature and are NOT enabled by default. To accept payments via QR code in the bot, you must raise a request with Razorpay support or your account manager to activate "QR Codes" on your account. Once activated, the bot can generate them automatically via API.
Connecting Razorpay
Open the bot settings using the /settings command and navigate to Merchant Accounts.
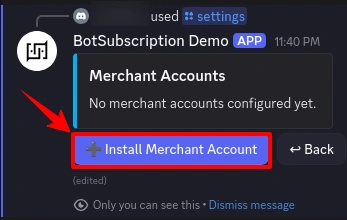
Step 1: Install Merchant Account
Click "Install Merchant Account" to add a new payment provider.
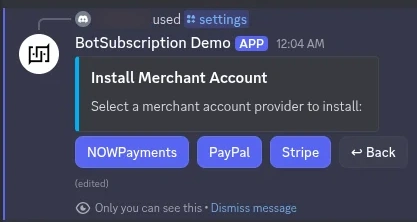
Step 2: Select Razorpay
Choose Razorpay from the list of available payment providers.
Step 3: Review Requirements
The bot displays the credentials needed:
- Key ID
- Key Secret
The current environment (Sandbox/Test or Production/Live) is shown. Click Configure to proceed.
Step 4: Enter Your Credentials
A secure form appears where you enter your Razorpay keys:
- Paste your
Key ID - Paste your
Key Secret
Click Submit to complete the setup.
Step 5: Confirmation
After validation, BotSubscription automatically configures required webhooks and confirms the integration.
Environment Modes
Test Mode (Sandbox)
Use Test Mode to verify your setup without charging real money.
- Status: Enabled when the bot is in Test Mode.
- Cards: Use Razorpay Test Card Details.
- UPI: In test mode, you can use any VPA like
success@razorpayto simulate a successful payment.
We recommend verifying the full subscription flow including payment and role assignment in Test Mode before going Live.
Live Mode (Production)
Switch to Live Mode to accept real payments.
- Status: Enabled when the bot is in Live Mode.
- Requirement: You must have a fully activated Razorpay account with completed KYC.
Troubleshooting
"Invalid Key ID or Secret"
- Ensure you have copied the correct keys corresponding to the mode (Test or Live) you are using.
- Check for any leading or trailing whitespace when pasting the keys.
"International Payments Failing"
- By default, Razorpay may not have international payments enabled.
- Go to Account & Settings -> International Payments in your dashboard to request enablement.
Last updated: